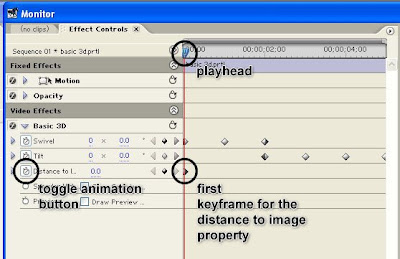
Make sure that the clip on the Timeline is still selected. And in the Effect Controls window, bring the playhead back to the leftmost edge of the clip's timeline. Then, click on the Toggle Animation button beside the phrase Distance to Image in order to enable keyframing for this property. Keep the Distance to Image value at zero.

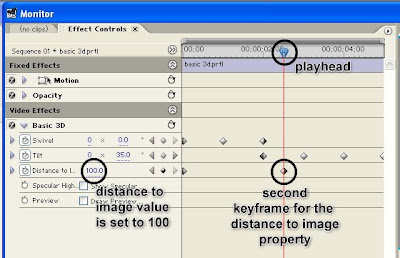
Next, move the playhead forward. Position it somewhere within the middle of the clip's timeline and add another keyframe to the Distance to Image property. On this keyframe, change the Distance to Image value to 100.

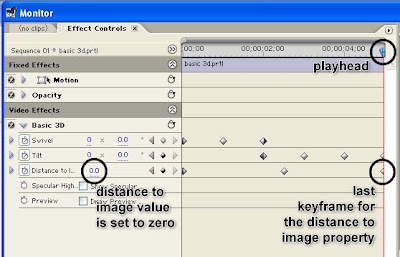
Let's add one last keyframe for the Distance to Image property. Position the playhead on the rightmost edge of the clip's timeline and add a keyframe there. On this keyframe, change the Distance to Image value back to zero.

By now, when you play your sequence on the program monitor, you should have something like this:
go back to Working with Adobe Premiere Pro's Basic 3D Video Effect Part 3
continue to Working with Adobe Premiere Pro's Basic 3D Video Effect Part 5
No comments:
Post a Comment